

An air fryer makes it easy to prepare crispy chips, chicken wings, roasted vegetables, and many other delicious meals with less oil than traditional deep-frying. However, after regular use, grease, food crumbs, and burnt-on residue can build up inside the basket and around the cooking area.
Knowing how to clean an air fryer basket properly helps keep your appliance in good condition, prevents unpleasant smells, and makes your food taste its best. The good news is that cleaning an air fryer does not have to be difficult. With warm water, washing-up liquid, a soft sponge, and a little patience, you can remove most everyday messes in just a few minutes.
Whether you use a traditional basket-style air fryer or a larger air fryer oven, regular cleaning is important. Some parts can be washed in the sink, while the heating element and interior need a more careful approach.
In this guide, you’ll learn how to clean an air fryer basket, remove stubborn grease, clean the heating element, and choose suitable cleaning brushes and degreasers. You’ll also discover simple cleaning hacks and how often to clean your air fryer to keep it ready for your next recipe.
Why You Need a Clean Air Fryer
Cleaning your air fryer regularly is about more than keeping it looking nice. Grease and leftover food can affect how your appliance works and may cause unpleasant smells during cooking.
Here are some important reasons to keep your air fryer clean.
1. Prevent Unpleasant Smells
Food particles, cooking oil, and grease can remain inside the basket after cooking. When you use the air fryer again, these residues can heat up and produce unpleasant smells.
This is especially noticeable when cooking foods with strong flavours, such as fish, bacon, garlic, or heavily seasoned chicken.
Cleaning the basket and removable parts after use helps prevent old food smells from affecting your next meal.
2. Reduce Smoke During Cooking
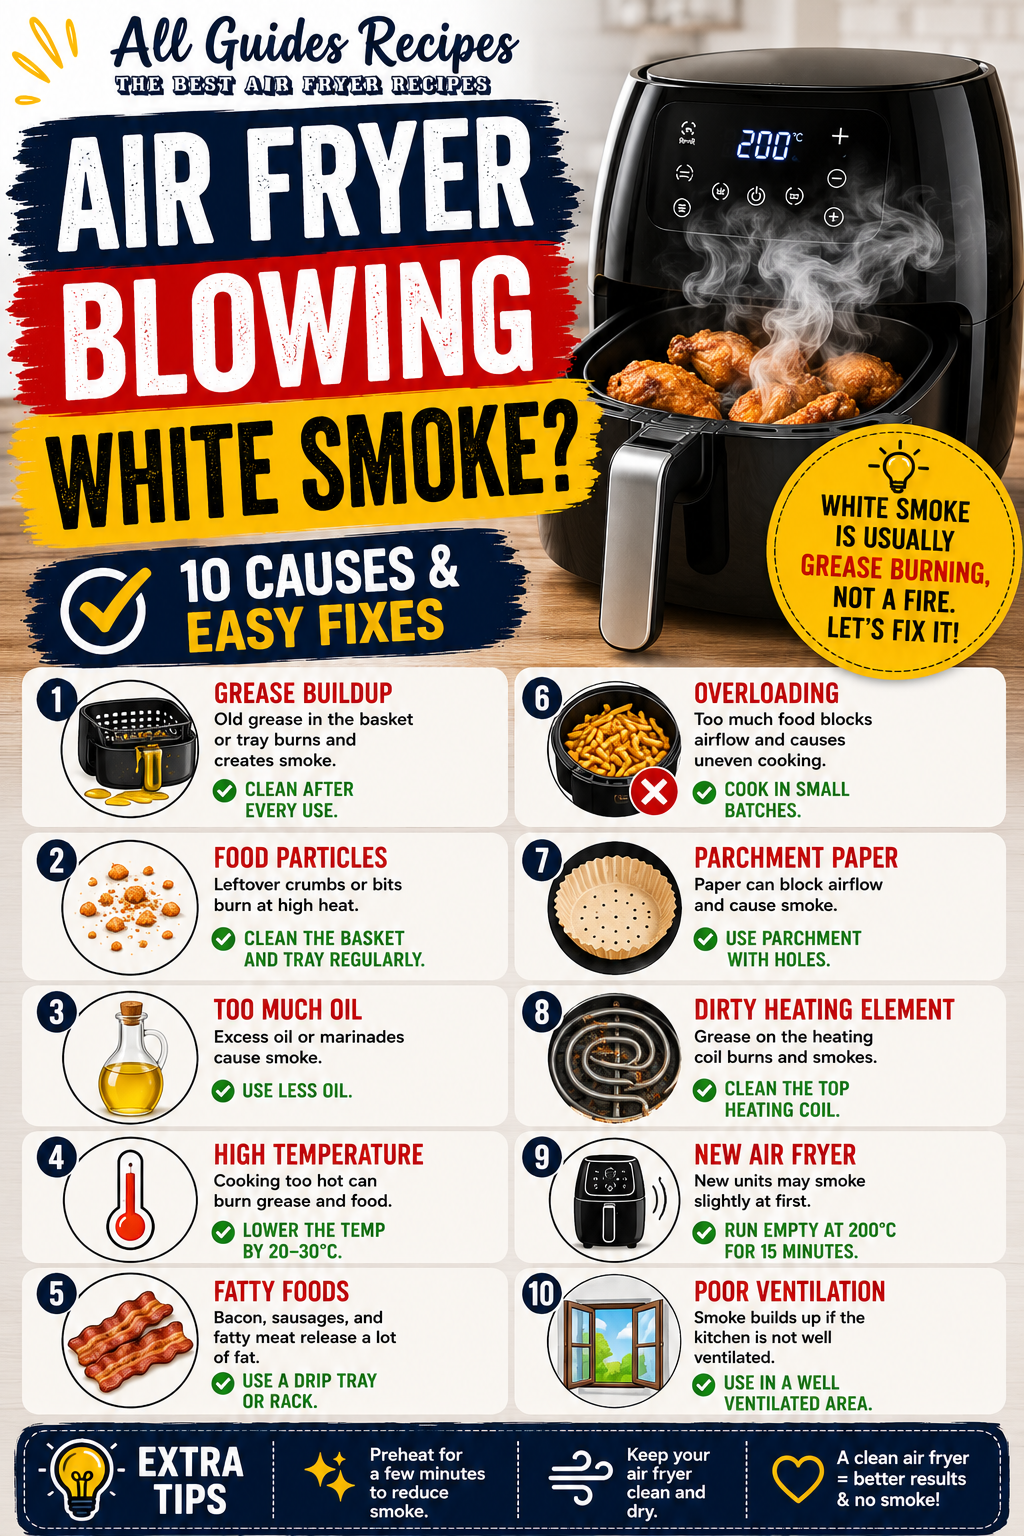
Excess grease and burnt food particles can produce smoke when exposed to high temperatures.
If you notice smoke coming from your air fryer, check for accumulated grease in the basket, drawer, and accessible cooking area. Cleaning these parts can help prevent residue from burning during future cooking sessions.
If smoke continues after cleaning, stop using the appliance and check the manufacturer’s troubleshooting instructions.
3. Maintain Better Cooking Performance
Air fryers rely on hot air circulating around the food. Heavy food residue or grease buildup in the cooking area can interfere with normal airflow or appliance operation.
Keeping the basket, tray, and accessible interior clean helps the appliance work as intended.
4. Protect the Nonstick Coating
Many air fryer baskets have a nonstick coating that can be damaged by abrasive cleaning tools.
Using soft sponges, warm soapy water, and suitable brushes helps remove food residue without unnecessarily scratching the surface.
Avoid metal scourers, sharp utensils, and harsh abrasive powders unless the manufacturer specifically approves them.
5. Improve Food Hygiene
Food crumbs and grease left inside the appliance can become difficult to remove over time.
Regular cleaning helps prevent old food residue from accumulating and keeps the surfaces that come into contact with food cleaner.
Always allow the appliance to cool before cleaning, and make sure removable parts are completely dry before putting them back.
How to Clean Air Fryer
Cleaning an air fryer basket after everyday use is usually quick and straightforward. You do not need expensive products or complicated equipment for normal cleaning.
What You’ll Need
- Warm water
- Mild washing-up liquid or dish soap
- Soft sponge or non-scratch cleaning pad
- Microfibre cloth
- Soft-bristled cleaning brush
- Clean kitchen towel or drying cloth
Before cleaning, check your air fryer manual for specific instructions about removable parts and dishwasher safety.
Step 1: Turn Off and Unplug the Air Fryer
Switch off the air fryer, unplug it from the electrical outlet, and allow it to cool completely.
Never clean the appliance while it is switched on or still hot. Hot baskets and trays can cause burns, and water must never come into contact with electrical components.
Step 2: Remove the Basket and Tray
Carefully remove the cooking basket, drawer, and any removable crisper plate or accessories.
Dispose of leftover food crumbs and excess grease. Allow hot grease to cool before disposing of it safely. Never pour cooking grease down the sink.
Step 3: Soak the Basket in Warm Soapy Water
Fill your sink or a suitable washing-up bowl with warm water and add a small amount of mild dish soap.
Place the removable basket and tray in the water, provided the manufacturer’s instructions allow soaking.
Let them soak for approximately 10–15 minutes to soften grease and loosen food particles.
Avoid using boiling water, which may not be suitable for every nonstick coating or component.
Step 4: Clean with a Soft Sponge
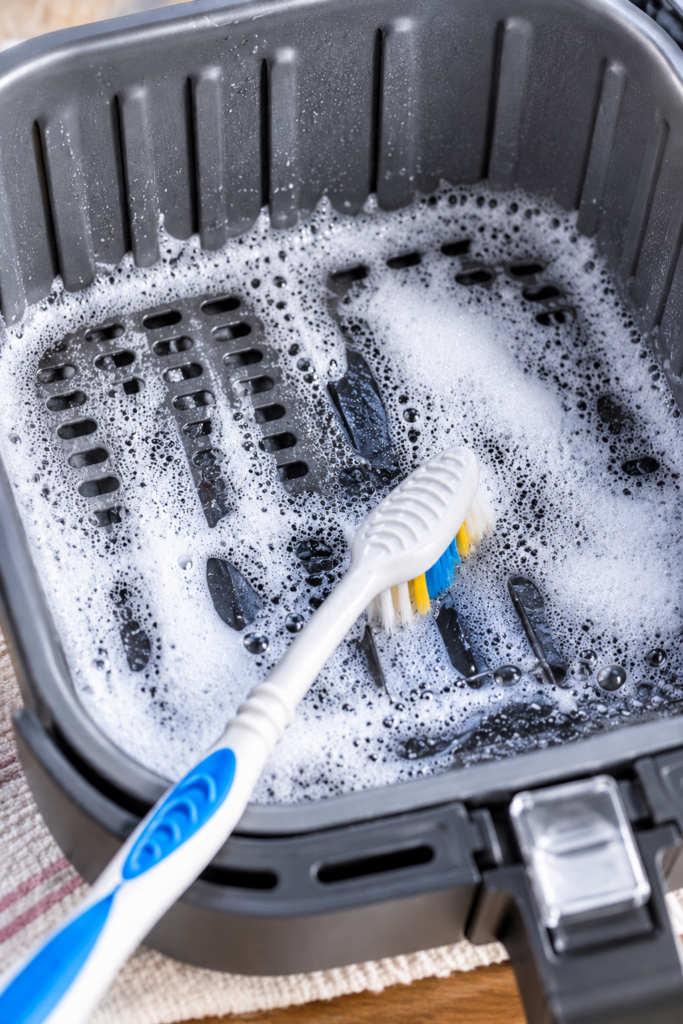
Use a soft sponge or non-scratch cleaning pad to gently wash the basket and tray.
Pay particular attention to the corners, edges, and holes where small pieces of food can become trapped.
For stubborn residue, use a soft-bristled brush to reach difficult areas.
Do not use steel wool, metal brushes, knives, or other sharp objects. These can scratch or damage the nonstick surface.
Step 5: Rinse Thoroughly
Rinse the removable parts under clean running water to remove all soap and loosened grease.
Check that no food particles remain in the holes, corners, or underneath the crisper plate.
Step 6: Dry Completely
Dry the basket and tray with a clean kitchen towel or leave them to air-dry completely.
Make sure no water remains in the corners or underneath removable components before putting them back into the air fryer.
Step 7: Wipe the Interior and Exterior
Use a slightly damp microfibre cloth to wipe the inside of the air fryer drawer or cooking compartment.
For the exterior, use a soft damp cloth and mild cleaning solution if needed.
Never immerse the main air fryer unit in water, spray cleaning products directly into its electrical openings, or allow moisture to enter the motor or control panel.
Once everything is dry, reassemble the appliance according to the manufacturer’s instructions.
Hacks for How to Clean Air Fryer Oven
Air fryer ovens are usually larger than basket-style models and often include several accessories, such as wire racks, baking trays, drip trays, and rotisserie components.
Because these appliances have more surfaces and corners, cleaning them requires a slightly different approach.
1. Remove All Accessories First
Before cleaning, unplug the air fryer oven and allow it to cool completely.
Remove the racks, trays, crumb tray, and other removable accessories. Clean each part separately according to the manufacturer’s instructions.
This gives you better access to the interior and makes it easier to remove food residue.
2. Clean the Crumb Tray Regularly
The crumb tray collects small pieces of food and grease during cooking.
Remove it after the appliance has cooled and empty the crumbs into the bin. Wash it with warm soapy water if it is approved for washing.
Leaving crumbs inside can cause them to burn and create unpleasant smells during the next cooking session.
3. Use a Soft Brush for Wire Racks
Wire racks can trap grease and small food particles between their bars.
A soft-bristled brush helps remove residue from these areas without damaging the rack’s finish.
If the rack is dishwasher-safe, you can follow the manufacturer’s dishwasher instructions instead.
4. Clean the Glass Door
Use a soft microfibre cloth with warm water and a little mild dish soap to clean the glass door.
Avoid abrasive pads and harsh chemicals that may damage the glass or surrounding finish.
Dry the glass with a clean cloth to prevent water marks.
5. Use a Damp Cloth for the Interior
Wipe the interior walls with a slightly damp cloth to remove loose crumbs and light grease.
For stubborn residue, hold a warm, damp cloth against the area for a short time to soften it before gently wiping.
Never pour water into the appliance or spray cleaning products directly inside it.
6. Clean Around the Heating Area Carefully
Grease can accumulate around the upper cooking area of an air fryer oven.
Use a soft cloth or brush only when the appliance is unplugged and completely cool. Follow the manufacturer’s instructions for cleaning around the heating elements.
Do not bend, pull, scrape, or apply liquid directly to the heating elements.
7. Clean the Door Seals and Edges
If your air fryer oven has seals or narrow edges around the door, check these areas for crumbs and grease.
Use a soft, slightly damp cloth to wipe accessible surfaces. Avoid pulling or stretching seals, and do not use harsh chemicals that could damage them.
How Often Should You Clean Your Air Fryer?
How often you clean your air fryer depends on how frequently you use it and what you cook.
For most households, a simple cleaning routine after every use, combined with a deeper clean periodically, is a good approach.
| Air fryer part | Recommended cleaning frequency |
|---|---|
| Basket and crisper plate | After every use |
| Drawer or drip tray | After every use |
| Interior cooking area | Wipe after use when needed |
| Exterior and control area | Weekly or when dirty |
| Heating element | Inspect regularly; clean when needed according to the manual |
| Air fryer oven racks and trays | After every use |
| Deep cleaning | Approximately every 1–2 months, depending on use |
After Every Use
Wash the removable basket, tray, and other food-contact accessories after each cooking session.
This prevents grease and food residue from becoming harder to remove.
Once a Week
If you use your air fryer frequently, take a little extra time to inspect the interior and exterior.
Wipe away grease marks, check the ventilation areas for visible dust, and make sure the cooking compartment is clean.
Every One or Two Months
A more thorough clean may be useful every one or two months, depending on how often you cook and how much grease accumulates.
If you frequently cook fatty foods such as bacon, sausages, or chicken wings, you may need to deep-clean the appliance more often.
Do not wait for the scheduled deep clean if you notice smoke, heavy grease buildup, or unpleasant smells. Address visible residue promptly.
How to Deep Clean an Air Fryer
Sometimes ordinary washing is not enough, especially if grease has been building up for several weeks.
A deep clean helps remove stubborn food residue from the basket, tray, and accessible interior surfaces.
What You’ll Need
- Warm water
- Mild dish soap
- Soft sponge
- Non-scratch cleaning brush
- Microfibre cloth
- Baking soda, optional
- White vinegar, optional and only for compatible removable parts
Always check the appliance manual before using additional cleaning products or soaking removable components.
Step 1: Unplug and Cool the Appliance
Switch off and unplug the air fryer. Allow it to cool completely before removing any accessories.
Never attempt to deep-clean a hot appliance.
Step 2: Remove and Soak the Removable Parts
Take out the basket, drawer, crisper plate, and other removable accessories.
If the manufacturer allows soaking, place them in warm water with a little dish soap for 15–20 minutes.
This helps soften hardened grease and makes cleaning easier.
Step 3: Scrub Gently
Use a soft sponge to remove loosened residue.
For corners and narrow spaces, use a soft-bristled brush. Avoid aggressive scrubbing, particularly on nonstick surfaces.
If some grease remains, repeat the soaking process instead of using a metal scourer.
Step 4: Clean the Inside of the Appliance
Use a damp microfibre cloth to wipe accessible interior surfaces.
For stuck-on residue, hold a warm, damp cloth against the affected area for a few minutes before wiping gently.
Keep moisture away from electrical components, ventilation openings, and the heating element.
Step 5: Clean the Exterior
Wipe the outside of the appliance with a slightly damp cloth.
Pay attention to fingerprints, grease marks, and the handle. Use mild soap if necessary, then wipe away any remaining cleaning solution.
Step 6: Rinse and Dry
Rinse all washable accessories thoroughly and dry them completely.
Allow the appliance interior to air-dry before reassembling it. Make sure no water remains around electrical parts.
Step 7: Reassemble and Inspect
Once everything is completely dry, put the basket, tray, and accessories back in place.
Check that the basket slides in correctly and that there is no leftover grease or cleaning product residue.
Can I Use Vinegar and Baking Soda to Clean Air Fryer?
Yes, vinegar and baking soda can be useful for certain cleaning tasks, but they should be used carefully and only on compatible surfaces.
Both products are commonly used for household cleaning. However, they are not suitable for every air fryer component, especially nonstick coatings and electrical areas.
Using Baking Soda to Remove Grease
Baking soda can help with some stubborn grease and food stains on compatible removable parts.
To make a simple cleaning paste:
- Place 2 tablespoons of baking soda in a small bowl.
- Add a little water gradually until you form a thick paste.
- Apply a small amount to a compatible removable surface.
- Leave it for approximately 10 minutes.
- Gently wipe with a soft, non-scratch sponge.
- Rinse thoroughly and dry completely.
Do not scrub aggressively. Baking soda can be mildly abrasive, so avoid using it on delicate nonstick coatings unless the manufacturer specifically approves it.
Using White Vinegar
White vinegar can help remove mineral deposits and some lingering odours from compatible washable accessories.
For a mild solution, mix equal parts white vinegar and water.
Apply it to a compatible removable part with a soft cloth, then rinse thoroughly with clean water and dry.
Do not spray vinegar into the air fryer itself or apply it directly to heating elements, electrical components, or surfaces that the manufacturer advises against exposing to acidic cleaners.
Can You Mix Vinegar and Baking Soda?
Although vinegar and baking soda are often mentioned together in cleaning tips, mixing them directly causes a chemical reaction that produces bubbles and releases carbon dioxide.
The reaction largely neutralises the cleaning properties of both ingredients, so combining them is not necessarily more effective than using them separately.
For air fryer cleaning, warm water and mild dish soap are usually the best first choice.
Important: Never mix vinegar with bleach or chlorine-based cleaning products. This can release dangerous chlorine gas.
Best Way to Clean Air Fryer Heating Element
The heating element is one of the most important parts of an air fryer. It produces the heat needed to cook food, so it is important to keep the surrounding area free from excessive grease and food particles.
However, cleaning this area requires extra care because it contains electrical components.
Step 1: Unplug the Air Fryer
Switch off and unplug the appliance. Allow it to cool completely before turning it over or accessing the heating area.
Never clean the heating element while the appliance is connected to electricity.
Step 2: Remove the Basket and Drawer
Take out the basket and drawer to make the heating area easier to access.
Check the manufacturer’s instructions to see how the appliance should be positioned for cleaning. Do not turn or tilt it in a way that could damage internal components.
Step 3: Inspect the Heating Element
Look for visible grease, crumbs, and food particles around the heating element.
Some air fryer models have easily accessible heating elements, while others have protective covers or restricted access.
Do not remove screws, protective panels, or internal components unless the manufacturer specifically instructs you to do so.
Step 4: Use a Soft Brush
If the manual permits cleaning the accessible area, use a clean, dry, soft-bristled brush to remove loose crumbs.
Work gently and avoid bending, scraping, or pulling the heating element.
A clean, dry microfibre cloth may also be suitable for wiping accessible cool surfaces, depending on the manufacturer’s instructions.
Step 5: Remove Accessible Grease Carefully
If there is grease around the heating area, follow the manufacturer’s recommended cleaning method.
Do not spray degreaser, vinegar, water, or other liquid directly onto the heating element.
Never use metal brushes, abrasive pads, knives, or sharp objects.
Step 6: Allow Everything to Dry
Before using the air fryer again, make sure the accessible area is completely dry and free from cleaning residue.
If grease is heavily baked onto the heating element or you cannot safely access it, consult the manufacturer’s support instructions rather than trying to scrape it off.
Safety tip: If the appliance produces persistent smoke, unusual smells, sparks, or signs of electrical damage, stop using it and seek professional advice or manufacturer support.
How to Clean Baked-on Grease from an Air Fryer
Baked-on grease can be one of the most frustrating air fryer cleaning problems. It often develops after repeated cooking sessions, particularly when preparing fatty foods.
The good news is that you can often remove stubborn grease without harsh chemicals or aggressive scrubbing.
1. Start with Warm Soapy Water
For removable parts, fill a sink or bowl with warm water and mild dish soap.
Soak the basket and tray for approximately 15–20 minutes, if the manufacturer allows it.
The warm water helps soften hardened grease and makes it easier to remove.
2. Use a Soft Cleaning Brush
After soaking, gently scrub the affected areas with a soft-bristled brush.
Pay particular attention to corners, grooves, and the underside of the crisper plate.
Avoid metal scourers and stiff brushes that could scratch the nonstick coating.
3. Apply Baking Soda Paste if Suitable
For compatible removable surfaces, mix baking soda with a little water to create a paste.
Apply it to the affected area, leave it for approximately 10 minutes, and gently wipe it away.
Rinse thoroughly and check that no residue remains.
Do not use baking soda paste on a nonstick surface unless your appliance manufacturer confirms that it is safe.
4. Repeat Instead of Scrubbing Harder
If grease remains, soak the part again and repeat the cleaning process.
Several gentle cleaning sessions are safer for delicate surfaces than one aggressive scrubbing session.
5. Clean the Surrounding Interior
Use a slightly damp cloth to remove accessible grease from the interior cooking compartment.
Do not pour water into the appliance or allow moisture to reach electrical components.
6. Dry Everything Completely
Once the grease has been removed, rinse and dry all washable accessories thoroughly.
Allow the interior to air-dry before using the air fryer again.
How to Prevent Baked-on Grease
A few habits can make future cleaning much easier:
- Clean the basket after every use.
- Remove excess grease from fatty foods after cooking.
- Avoid using more oil than necessary.
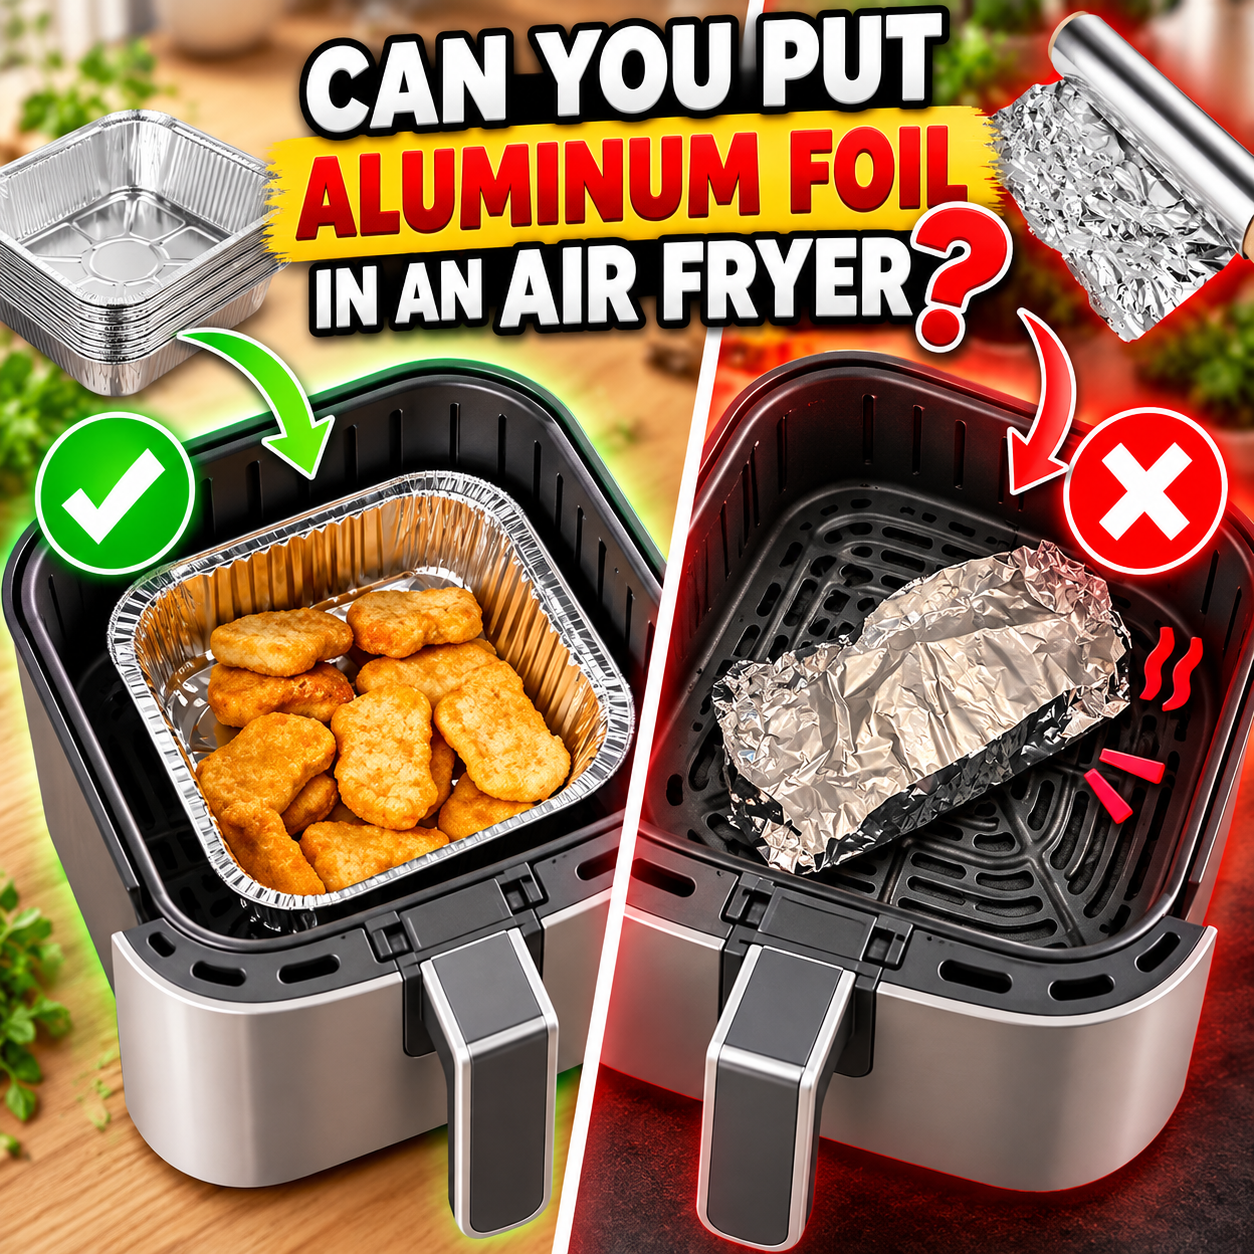
- Use suitable air fryer liners only when permitted by the manufacturer.
- Do not allow food residue to accumulate over several cooking sessions.
- Wipe accessible interior surfaces regularly.
How to Clean Air Fryer Basket: Best Degreaser and Cleaning Spray
A suitable degreaser or cleaning spray can help remove stubborn grease, but you do not necessarily need a specialist product to clean your air fryer.
For everyday cleaning, mild dish soap and warm water are usually sufficient. For tougher residue, a product specifically approved for the material and surface you are cleaning may be useful.
What to Look for in an Air Fryer Cleaner
Before purchasing a degreaser or cleaning spray, consider the following:
Nonstick-safe formula: If you are cleaning a coated basket, choose a product explicitly labelled as safe for that surface.
Food-contact suitability: Look for clear instructions explaining whether the product can be used on food-contact surfaces and whether rinsing is required.
Grease-removing performance: A good cleaner should help loosen cooking oil and baked-on residue without requiring aggressive scrubbing.
Easy rinsing: Cleaning products that rinse away easily are more convenient for removable cooking accessories.
Clear usage instructions: Always follow the manufacturer’s dilution, contact-time, and rinsing instructions.
How to Use a Degreaser Safely
- Unplug the air fryer and allow it to cool completely.
- Remove the basket and other washable accessories.
- Check that the cleaner is suitable for the surface.
- Apply it according to the product instructions, preferably to the removable part rather than spraying inside the appliance.
- Allow the recommended contact time.
- Gently clean with a suitable sponge or brush.
- Rinse thoroughly if required by the label.
- Dry completely before using the air fryer again.
Never use oven cleaner, drain cleaner, or an unapproved industrial degreaser on an air fryer basket.
Do not mix different cleaning chemicals, and never spray cleaning products directly onto the heating element or electrical components.
What Is the Best Air Fryer Degreaser and Cleaning Spray?
There is no single degreaser that is best for every air fryer. The right product depends on the basket coating, appliance materials, and the type of grease you need to remove.
Here are the main options worth considering.
1. Mild Dish Soap
For most households, mild dish soap is the easiest and most practical option.
It is designed to remove ordinary food grease and is generally suitable for washable kitchen utensils and accessories when used according to the label.
Mix it with warm water and use a soft sponge to clean the basket and tray.
2. Nonstick-Safe Kitchen Degreaser
A kitchen degreaser may be useful when regular dish soap is not enough.
Choose a product that explicitly confirms compatibility with your air fryer basket’s coating. Follow the instructions carefully, including any required rinsing.
Do not assume that a product labelled as a kitchen degreaser is automatically safe for nonstick cookware.
3. Food-Safe Kitchen Cleaning Spray
A suitable kitchen cleaning spray can help remove fingerprints, light grease, and marks from the exterior of an air fryer.
Check whether the product is intended for the surface you are cleaning. Even products marketed as food-safe may require rinsing before a surface comes into contact with food.
4. Baking Soda
Baking soda is an inexpensive household cleaning option for compatible removable parts.
It can help loosen some stains when mixed with water, but its mildly abrasive nature means it is not suitable for every nonstick coating.
My Recommendation
For everyday air fryer cleaning, start with warm water and mild dish soap. It is simple, affordable, and effective for most food residue.
Only move to a specialist degreaser when necessary, and always check that the product is approved for the specific surface you are cleaning.
What Is the Best Cleaning Brush for an Air Fryer?
A good cleaning brush makes it easier to remove crumbs and grease from corners, grooves, and other hard-to-reach areas.
However, the brush should be soft enough to avoid damaging the nonstick coating.
Here are some useful types of cleaning brushes.
1. Soft Nylon Dish Brush
A soft nylon dish brush is a practical option for cleaning removable air fryer baskets and trays.
Its bristles can reach corners and textured surfaces while being gentler than metal brushes.
Choose a brush with flexible bristles and a comfortable handle.
2. Silicone Cleaning Brush
A silicone brush is another gentle option for cleaning compatible removable surfaces.
Silicone bristles are flexible and easy to rinse, making them useful for light grease and food residue.
They may not remove heavily baked-on deposits as effectively as a suitable nylon brush.
3. Small Detail Cleaning Brush
A small detail brush is useful for narrow corners, grooves, and areas around removable accessories.
Choose a soft-bristled version rather than a hard or abrasive brush.
Use it only on accessible surfaces that the manufacturer allows you to clean.
4. Microfibre Cleaning Cloth
Although it is not technically a brush, a microfibre cloth is one of the most useful tools for cleaning an air fryer.
It works well for wiping the exterior, glass doors, and accessible interior surfaces.
Use a slightly damp cloth for ordinary marks and a dry cloth to finish.
What Cleaning Brushes Should You Avoid?
Avoid using:
- Steel wool.
- Metal wire brushes.
- Hard abrasive brushes.
- Sharp scraping tools.
- Rough scouring pads.
These tools can scratch nonstick coatings, damage protective finishes, and shorten the useful life of your air fryer basket.
My Recommendation
For most air fryer owners, a soft nylon dish brush combined with a microfibre cloth is enough for regular cleaning.
A small detail brush can be useful if your basket has narrow grooves or difficult corners.
Summing Up How to Clean Air Fryer
Learning how to clean an air fryer basket is one of the easiest ways to keep your appliance in good condition and ready for everyday cooking.
The best approach is to clean removable parts after every use with warm water, mild dish soap, and a soft sponge. For stubborn grease, allow compatible parts to soak before gently scrubbing them with a suitable brush.
Remember to unplug the appliance, let it cool completely, and keep water and cleaning products away from the heating element and electrical components. Always follow your manufacturer’s instructions, particularly when using vinegar, baking soda, degreasers, or dishwasher cleaning methods.
A simple cleaning routine can prevent grease buildup, reduce unpleasant smells, and make your air fryer easier to maintain.
My top tip: Don’t wait until your air fryer basket is covered in baked-on grease. A quick clean after every cooking session is much easier than tackling weeks of accumulated residue.